
绝了!你裁我剪,斯尼帕!文末源码
2018年我入手了一台Swithc『 你裁我剪!斯尼帕』是我玩过的最为欢乐游戏,不过为了安全安全起见,大概只玩了十几关!

因为它的威力不亚与『分手厨房』,需要两人密切配合,但这个过程很容易两个人闹矛盾,没玩过的伙伴可以看下这个视频!
当时我就在想,在 Creator 中要怎么实现图片的多边形裁剪,除了用 Mask 以处就没有其他办法了!
不过,今天给大家带来的是『请容我安眠』价值百万的技术分享,攻克精灵多边形裁剪问题,并且文末还有源码送上!
Cocos Creator 基于 Assembler 实现的图片切割及自定义遮罩
1自定义渲染组件-TexturePlus
2实现自定义多边形渲染
3图片切割效果

4图片破碎效果

5图片破碎后还原效果
6碎片掉落效果

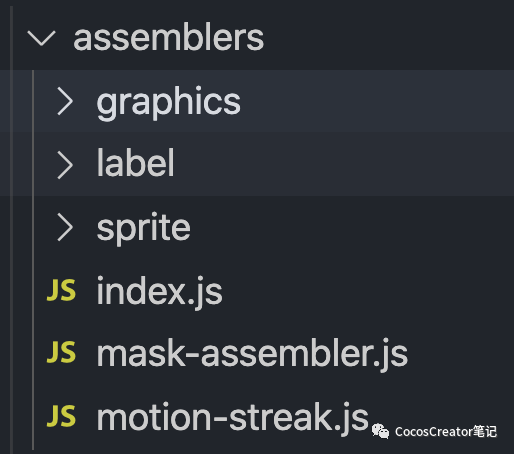
源码路径位于 CocosEngine/core/renderer/assembler.js
对于 Assembler 的个人理解:
在 cocos 中的每一个渲染组件,例如 cc.Sprite,cc.Label,cc.Graphics 等, 它们都继承于 RenderComponent,且都有一个对应的 Assembler,从而实现不同的渲染效果
Assembler 提供两个静态方法,register 和 init
register 方法将渲染组件和 Assembler 绑定,init 方法用于初始化 Assembler
自定义 Assembler 的核心就是将顶点数据填充到 RenderData 中
Assembler.register = function (renderCompCtor, assembler) {renderCompCtor.__assembler__ = assembler;};Assembler.init = function (renderComp) {let renderCompCtor = renderComp.constructor;let assemblerCtor = renderCompCtor.__assembler__;while (!assemblerCtor) {renderCompCtor = renderCompCtor.$super;if (!renderCompCtor) {cc.warn(`Can not find assembler for render component : [${cc.js.getClassName(renderComp)}]`);return;}assemblerCtor = renderCompCtor.__assembler__;}if (assemblerCtor.getConstructor) {assemblerCtor = assemblerCtor.getConstructor(renderComp);}if (!renderComp._assembler || renderComp._assembler.constructor !== assemblerCtor) {let assembler = assemblerPool.get(assemblerCtor);assembler.init(renderComp);renderComp._assembler = assembler;}};
Assembler 的实现可以参考 Assembler2D,源码位于 CocosEngine/core/renderer/assembler-2d.js,以下是对的 Assembler2D 源码的一些注解
export default class Assembler2D extends Assembler {constructor () {super();this._renderData = new RenderData();this._renderData.init(this);this.initData();this.initLocal();}// 计算总共所需的空间大小get verticesFloats () {return this.verticesCount * this.floatsPerVert;}initData () {let data = this._renderData;data.createQuadData(0, this.verticesFloats, this.indicesCount);}// 更新顶点颜色信息updateColor (comp, color) {}// 更新顶点坐标信息updateWorldVerts (comp) {}// 将renderdata中的数据填充到buffer中, 也计算填充了三角形顶点索引fillBuffers (comp, renderer) {}}// 将这5个属性注入Assembler2D.prototype内cc.js.addon(Assembler2D.prototype, {floatsPerVert: 5, // 一个顶点所需的空间 xy两个,uv两个,color一个verticesCount: 4, // 顶点个数indicesCount: 6, // 三角形顶点个数uvOffset: 2, // uv在buffer中的偏移量,colorOffset: 4, // color在buffer中的偏移量// 格式如 x|y|u|v|color|x|y|u|v|color|x|y|u|v|color|......// 当然也可以自定义格式});cc.Assembler2D = Assembler2D;
简单概况一下就是:
编辑器内可编辑的多边形区域的实现,可以看之前那篇 MaskPlus,里面实现了如何实现一个自定义多边形遮罩以及自定义 Gizmo
1计算顶点的世界坐标
protected updateWorldVerts(comp: TexturePlus) {if (CC_NATIVERENDERER) {this.updateWorldVertsNative(comp);} else {this.updateWorldVertsWebGL(comp);}}protected updateWorldVertsWebGL(comp: TexturePlus) {let verts = this._renderData.vDatas[0];let matrix: cc.Mat4 = comp.node['_worldMatrix'];let matrixm = matrix.m,a = matrixm[0], b = matrixm[1], c = matrixm[4], d = matrixm[5],tx = matrixm[12], ty = matrixm[13];let justTranslate = a === 1 && b === 0 && c === 0 && d === 1;let floatsPerVert = this.floatsPerVert;if (justTranslate) {let polygon = comp.polygon;for(let i=0; iverts[i * floatsPerVert] = polygon[i].x + tx;verts[i * floatsPerVert+1] = polygon[i].y + ty;}} else {let polygon = comp.polygon;for(let i=0; iverts[i * floatsPerVert] = a * polygon[i].x + c * polygon[i].y + tx;verts[i * floatsPerVert+1] = b * polygon[i].x + d * polygon[i].y + ty;}}}
2计算顶点的 uv 坐标
uv 坐标的计算可以有几种方式,可以做成局部拉伸的效果,也可以做成裁剪效果,这里就以裁剪效果为例
uv 坐标取值区间是 0~1,对应的是 texture 的宽和高,按比例取的,取 texture 的高是反着取的,因为 cocos 的世界坐标原点在左下角
/** 计算uv, 锚点都是中心 */public static computeUv(points: cc.Vec2[], width: number, height: number) {let uvs: cc.Vec2[] = [];for(const p of points) {let x = MathUtils.clamp(0, 1, (p.x + width/2) / width);let y = MathUtils.clamp(0, 1, 1. - (p.y + height/2) / height);uvs.push(cc.v2(x, y));}return uvs;}
将 uv 填充到 RenderData 内
/** 更新uv */protected updateUVs(comp: TexturePlus) {let uvOffset = this.uvOffset;let floatsPerVert = this.floatsPerVert;let verts = this._renderData.vDatas[0];let uvs = [];if(comp.texture) {uvs = CommonUtils.computeUv(comp.polygon, comp.texture.width, comp.texture.height)}let polygon = comp.polygon;for(let i=0; ilet dstOffset = floatsPerVert * i + uvOffset;verts[dstOffset] = uvs[i].x;verts[dstOffset + 1] = uvs[i].y;}}
3计算顶点 color
/** 填充顶点的color */public updateColor(comp: TexturePlus, color: number) {let uintVerts = this._renderData.uintVDatas[0];if(!uintVerts) return ;color = color != null ? color : comp.node.color['_val'];let floatsPerVert = this.floatsPerVert;let colorOffset = this.colorOffset;let polygon = comp.polygon;for(let i=0; iuintVerts[colorOffset + i * floatsPerVert] = color;}}
这里可能会造成疑惑的是 color 填充进的是 uintVDatas,而之前的 uv 和 position 都是填充进的 vDatas,阅读 render-data 源码可以知道,uintVerts 和 vDatas 是共享的同一段 buffer
/** render-data.js */updateMesh (index, vertices, indices) {this.vDatas[index] = vertices;// 将vertices.buffer当成参数传入, 他们共享同一段bufferthis.uintVDatas[index] = new Uint32Array(vertices.buffer, 0, vertices.length);this.iDatas[index] = indices;this.meshCount = this.vDatas.length;},createData (index, verticesFloats, indicesCount) {let vertices = new Float32Array(verticesFloats);let indices = new Uint16Array(indicesCount);this.updateMesh(index, vertices, indices);},
4
计算三角形顶点索引
因为三角形是最小的绘制单元,所以需要将多边形转换为一个个三角形让 gpu 渲染,计算三角形我这里选择的方式是耳切法,针对耳切法的实现网上已经有有很多了,我这里也不再赘叙
ps: 我也是看了白玉无冰大佬的帖子才了解的 链接地址:https://forum.cocos.org/t/mask-mesh-gizmo/88288
代码也不复杂,需要注意的是 points 是有序的,且是逆时针方向排列,所以只需要循环判断是不是耳朵且三角形内没有包含其他点就行,找到后切掉再继续判断即可
// 将多边形分解为多个三角形public static splitPolygonByTriangle(points: cc.Vec2[]): number[] {if(points.length <= 3) return [0, 1, 2];let pointMap: {[key: string]: number} = {}; // point与idx的映射for(let i=0; ilet p = points[i];pointMap[`${p.x}-${p.y}`] = i;}const getIdx = (p: cc.Vec2) => {return pointMap[`${p.x}-${p.y}`]}points = points.concat([]);let idxs: number[] = [];let index = 0;while(points.length > 3) {let p1 = points[(index) % points.length], p2 = points[(index+1) % points.length], p3 = points[(index+2) % points.length];let splitPoint = (index+1) % points.length;let v1 = p2.sub(p1);let v2 = p3.sub(p2);if(v1.cross(v2) < 0) { // 是一个凹角, 寻找下一个index = (index + 1) % points.length;continue;}let hasPoint = false;for(const p of points) {if(p != p1 && p != p2 && p != p3 && this.isInTriangle(p, p1, p2 ,p3)) {hasPoint = true;break;}}if(hasPoint) { // 当前三角形包含其他点, 寻找下一个index = (index + 1) % points.length;continue;}// 找到了耳朵, 切掉idxs.push(getIdx(p1), getIdx(p2), getIdx(p3));points.splice(splitPoint, 1);}for(const p of points) {idxs.push(getIdx(p));}return idxs;}
// 判断一个点是否在三角形内public static isInTriangle(point: cc.Vec2, triA: cc.Vec2, triB: cc.Vec2, triC: cc.Vec2) {let AB = triB.sub(triA), AC = triC.sub(triA), BC = triC.sub(triB), AD = point.sub(triA), BD = point.sub(triB);//@ts-ignorereturn (AB.cross(AC) >= 0 ^ AB.cross(AD) < 0) && (AB.cross(AC) >= 0 ^ AC.cross(AD) >= 0) && (BC.cross(AB) > 0 ^ BC.cross(BD) >= 0);}
5在 assembler 中的使用
这一步的计算不要放到 fillBuffer 内,因为并不需要每帧计算,只需要在修改顶点时计算即可
this.indicesArr = CommonUtils.splitPolygonByTriangle(comp.polygon);/** 更新顶点数据 */protected updateVerts(comp: TexturePlus) {this.indicesArr = CommonUtils.splitPolygonByTriangle(comp.polygon);this.updateWorldVerts(comp);}/** 更新renderdata */protected updateRenderData(comp: TexturePlus) {if (comp._vertsDirty) {this.resetData(comp);this.updateUVs(comp);this.updateVerts(comp);this.updateColor(comp, null);comp._vertsDirty = false;}}
6修改顶点后重新分配 RenderData
public initData() {let data = this._renderData;data.createQuadData(0, this.verticesFloats, this.indicesCount);}public resetData(comp: TexturePlus) {let points = comp.polygon;if(!points || points.length < 3) return ;this.verticesCount = points.length;this.indicesCount = this.verticesCount + (this.verticesCount - 3) * 2;this._renderData.clear();this.initData();}
7填充 buffer
//每帧都会被调用fillBuffers(comp: TexturePlus, renderer) {if (renderer.worldMatDirty) {this.updateWorldVerts(comp);}let renderData = this._renderData;// vData里包含 pos, uv, color数据, iData中包含三角形顶点索引let vData = renderData.vDatas[0];let iData = renderData.iDatas[0];let buffer = this.getBuffer();let offsetInfo = buffer.request(this.verticesCount, this.indicesCount);// buffer data may be realloc, need get reference after request.// fill verticeslet vertexOffset = offsetInfo.byteOffset >> 2,vbuf = buffer._vData;if (vData.length + vertexOffset > vbuf.length) {vbuf.set(vData.subarray(0, vbuf.length - vertexOffset), vertexOffset);} else {vbuf.set(vData, vertexOffset);}// fill indiceslet ibuf = buffer._iData,indiceOffset = offsetInfo.indiceOffset,// vertexId是已经在buffer里的顶点数,也是当前顶点序号的基数vertexId = offsetInfo.vertexOffset;let ins = this.indicesArr;for(let i=0; iibuf[indiceOffset++] = vertexId + ins[i];}}
Cocos(Mac版本)引擎源码位于
CocosCreator.app/Contents/Resources/engine/cocos2d/
以下使用 CocosEngine 代替路径
图片切割其实就是做了线段和多边形的切割计算,原理就不多说了,直接上代码:
https://github.com/kirikayakazuto/CocosCreator_UIFrameWork/blob/SplitTexture/assets/Script/test/UISplitTexture.ts
TexturePlus:https://github.com/kirikayakazuto/CocosCreator_UIFrameWork/blob/SplitTexture/assets/Script/Common/Components/TexturePlus.ts
TextureAssembler:https://github.com/kirikayakazuto/CocosCreator_UIFrameWork/blob/SplitTexture/assets/Script/Common/Components/TexturePlus.ts
